Hướng dẫn sử dụng CKEditor và Upload file trong Spring MVC
Đăng lúc: 08:58 PM - 07/11/2023 bởi Charles Chung - 2636Trong bài viết này tôi sẽ hướng dẫn các bạn sử dụng CKEditor và upload file, upload hình ảnh trong Spring MVC

1. Kiến thức cần có
- Lập trình Java Core
- HTML - CSS - JavaScript
- JSP và Servlet
2. Các bước tạo ứng dụng Spring Hibernate và thực hiện các thao tác upload file và sử dụng ckeditor
Bước 1: tải ckeditor
Bước 2: Tạo Dynamic Web Project
- Khởi động Eclispe IDE -> vào menu File -> New -> Dynamic Web Project -> Nhập tên project "SpringWebMVCUploadFileCKEditor"
- Tiếp tục kích vào Next -> Next -> Chọn Generate web.xml deyployment desciptor và kích Finish
Bước 3: Convert sang Maven Project
- Kích chuột phải vào Project vừa tạo -> Configure -> Convert to Maven Project -> Finish
Bước 4: Khai báo các Maven Dependencies cần thiết
- Mở file pom.xml và cấu hình các Maven Dependencies gồm: spring web, web mvc, servlet api, jstl (xem bài trước nhé), bổ sung thêm upload file dependency sau.
<!--https://mvnrepository.com/artifact/commons-fileupload/commons-fileupload-->
<dependency>
<groupId>commons-fileupload</groupId>
<artifactId>commons-fileupload</artifactId>
<version>1.5</version>
</dependency>
<!-- https://mvnrepository.com/artifact/commons-io/commons-io -->
<dependency>
<groupId>commons-io</groupId>
<artifactId>commons-io</artifactId>
<version>2.13.0</version>
</dependency>
Bước 5: Cấu hình ứng dụng Spring Web Mvc
- Trong thư mục WEB-INF tạo thư mục views và tệp tin spring-servlet.xml cấu hình sau
<?xml version="1.0" encoding="UTF-8"?>
<beans xmlns="http://www.springframework.org/schema/beans"
xmlns:xsi="http://www.w3.org/2001/XMLSchema-instance"
xmlns:p="http://www.springframework.org/schema/p"
xmlns:context="http://www.springframework.org/schema/context"
xmlns:mvc="http://www.springframework.org/schema/mvc"
xsi:schemaLocation="http://www.springframework.org/schema/beans http://www.springframework.org/schema/beans/spring-beans-4.0.xsd
http://www.springframework.org/schema/context http://www.springframework.org/schema/context/spring-context-4.0.xsd
http://www.springframework.org/schema/mvc http://www.springframework.org/schema/mvc/spring-mvc-4.0.xsd">
<!-- chỉ ra các package chứa các lớp java được đăng ký như là các bean -->
<context:component-scan base-package="controllers,dao" />
<!-- chỉ tìm kiếm các bean trong cùng context application mà nó được định nghĩa -->
<context:annotation-config />
<!-- mặc định các basic components được ủy quyền gửi request tới các controller -->
<mvc:annotation-driven />
<!-- Cấu hình đường dẫn tài nguyên được phép truy cập -->
<mvc:resources mapping="/resources/**" location="/resources/" />
<!-- Tạo bean xác định view sẽ được sinh ra (thư mục chứa các view, đuôi tệp tin view) -->
<bean id="viewResolver" class="org.springframework.web.servlet.view.InternalResourceViewResolver" p:prefix="/WEB-INF/views/" p:suffix=".jsp" />
<!-- Tạo bean xác định dữ liệu multipart khi upload file -->
<bean id="multipartResolver" class="org.springframework.web.multipart.commons.CommonsMultipartResolver" />
</beans>
- Mở tệp web.xml và cấu hình vào bên trong thẻ <web-app> (xem bài trước)
Bước 6: Tạo các tệp tin theo cấu trúc mô tả sau
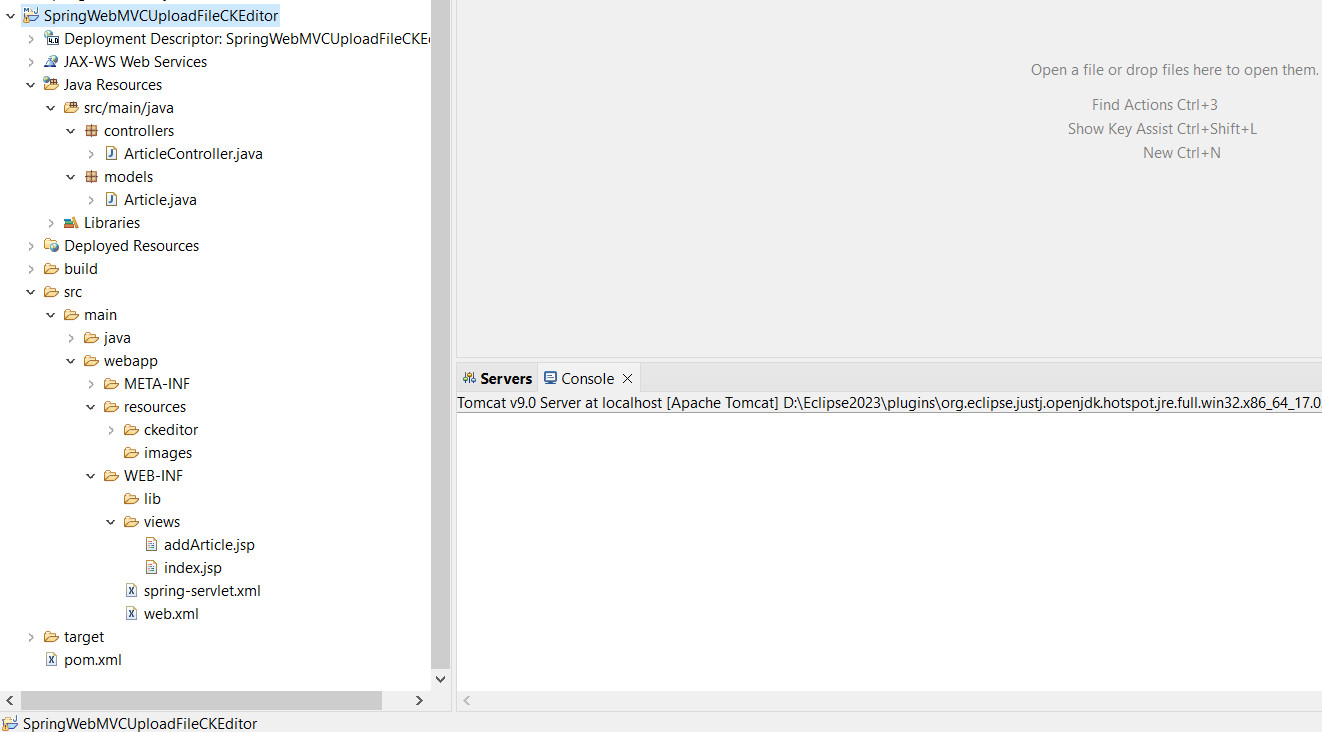
- Tạo thư mục resources như trên hình
- Trong resources tạo thư mục images
- Giải nén tệp tin ckeditor download ở trên về, sau đó copy thư mục ckeditor vào resources
- Tạo thư mục views như hình
- Trong views tạo tệp tin index.jsp
<body>
<h1>Danh sách bài viết</h1>
<p><a href="addArticle">Thêm mới</a></p>
<table border="1" style="width:100%">
<tr>
<th>Mã số</th>
<th>Tiêu đề</th>
<th>Nội dung</th>
<th>Ảnh</th>
</tr>
<c:forEach var="a" items="${articles}">
<tr>
<td>${a.id }</td>
<td>${a.title }</td>
<td>${a.description }</td>
<td><img src="${pageContext.servletContext.contextPath}/${a.picture}" width="100"/></td>
</tr>
</c:forEach>
</table>
</body>
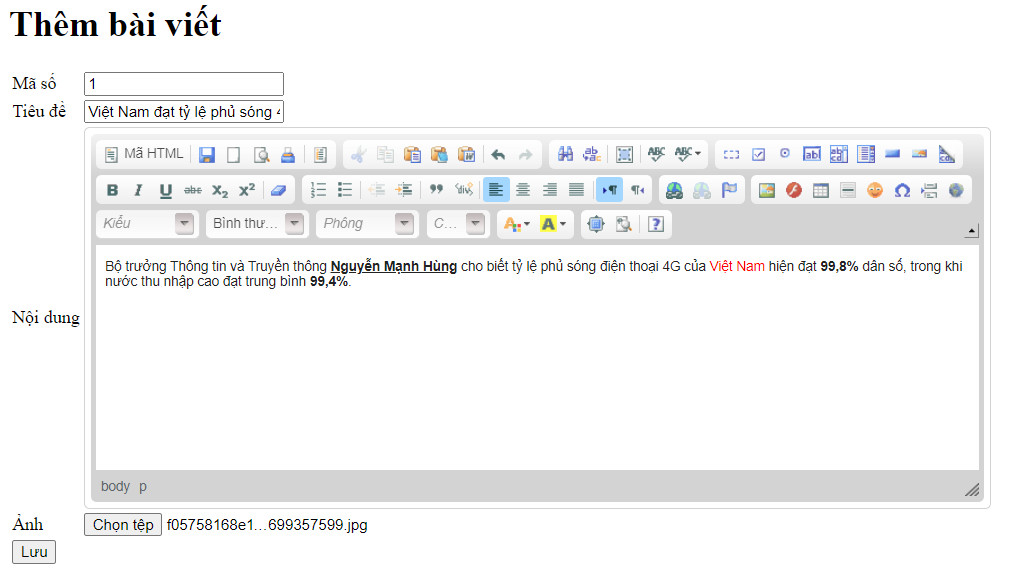
- Trong views tạo tệp tin addArticle.jsp
<%@ page language="java" contentType="text/html; charset=UTF-8" pageEncoding="UTF-8"%>
<%@ taglib prefix="f" uri="http://www.springframework.org/tags/form" %>
<!DOCTYPE html>
<html>
<head>
<meta charset="UTF-8">
<title>Insert title here</title>
<script src="${pageContext.servletContext.contextPath}/resources/ckeditor/ckeditor.js"></script>
</head>
<body>
<h1>Thêm bài viết</h1>
<f:form action="addArticle" method="post" modelAttribute="article" enctype="multipart/form-data">
<table>
<tr>
<td>Mã số</td>
<td><f:input path="id"/></td>
</tr>
<tr>
<td>Tiêu đề</td>
<td><f:input path="title"/></td>
</tr>
<tr>
<td>Nội dung</td>
<td><f:textarea path="description"/> </td>
</tr>
<tr>
<td>Ảnh</td>
<td><input type="file" name="file"/> </td>
</tr>
<tr>
<td colspan="2"><button>Lưu</button> </td>
</tr>
</table>
</f:form>
<script>
CKEDITOR.replace('description')
</script>
</body>
</html>
- Tạo tệp tin Article.java trong gói entities
package models;
public class Article{
private int id;
private String title;
private String description;
private String picture;
public Article() {
// TODO Auto-generated constructor stub
}
public int getId() {
return id;
}
public void setId(int id) {
this.id = id;
}
public String getTitle() {
return title;
}
public void setTitle(String title) {
this.title = title;
}
public String getDescription() {
return description;
}
public void setDescription(String description) {
this.description = description;
}
public String getPicture() {
return picture;
}
public void setPicture(String picture) {
this.picture = picture;
}
}
- Tạo tệp tin ArticleHome.java trong gói controllers
package controllers;
import java.io.File;
import java.io.IOException;
import java.util.ArrayList;
import java.util.List;
import javax.servlet.http.HttpServletRequest;
import models.Article;
import org.springframework.stereotype.Controller;
import org.springframework.ui.Model;
import org.springframework.web.bind.annotation.ModelAttribute;
import org.springframework.web.bind.annotation.RequestMapping;
import org.springframework.web.bind.annotation.RequestMethod;
import org.springframework.web.bind.annotation.RequestParam;
import org.springframework.web.multipart.MultipartFile;
@Controller
public class ArticleController {
private static List<Article> articles=new ArrayList<>();
@RequestMapping("/")
public String index(Model model) {
model.addAttribute("articles",articles);
return "index";
}
@RequestMapping(value= "/addArticle",method = RequestMethod.GET)
public String addArticle(Model model) {
model.addAttribute("article",new Article());
return "addArticle";
}
@RequestMapping(value= "/addArticle",method = RequestMethod.POST)
public String saveArticle(@ModelAttribute("article") Article article,@RequestParam("file") MultipartFile file, Model model, HttpServletRequest req) {
//upload 1 ảnh
if(file!=null) {
String uploadRootPath = req.getServletContext().getRealPath("resources/images");
File destination = new File(uploadRootPath+"/"+file.getOriginalFilename());
try {
file.transferTo(destination);
} catch (IllegalStateException | IOException e) {
e.printStackTrace();
}
article.setPicture("resources/images/"+file.getOriginalFilename());
}
articles.add(article);
return "redirect:/";
}
}
Bước 7: Run application
- Kích chuột phải vào project chọn Run As -> Run on Server -> Tomcat v9.0
- Màn hình danh sách bài viết

- Màn hình thêm bài viết
Kích để tải source code bài Hướng dẫn sử dụng CKEditor và Upload file trong Spring MVC
Training online liên hệ: Charles Chung
Video demo
thay lời cảm ơn!
Các bài cũ hơn
- Tạo bố cục-Layout trong Spring Web MVC sử dụng Apache Tile 3 (07:08 PM - 01/11/2023)
- Validation trong Spring MVC và Hibernate (11:05 AM - 31/10/2023)
- Tổng hợp các bài tập lập trình Java core in ra hình tam giác là ngôi sao hoặc số (có lời giải) (09:25 PM - 28/10/2023)
- CRUD trong ứng dụng Spring Web MVC với Hibernate-SQL Server Database (10:44 PM - 27/10/2023)
- Hibernate One to Many Mapping trong Spring Web MVC và cơ sở dữ liệu Oracle (08:01 PM - 26/10/2023)

